
Updated on 2021-05-18: Added new links to the CPS software and added information about the programming cables.
Warnings:
Connecting to the radio
To program this radio gather the following 4 items:
- CO01D radio
- Baofeng programming cable
- A Windows computer with the serial drivers for the Baofeng cable
- The CPS software
Just hook up the cable to your USB port and to the radio and that is it for the connection.
The CPS software
With the radio connected via the Baofeng cable, I hit “Read from Radio” and codeplug downloaded!
Programming
Just like any DMR radio, setting up things can take a while. I will walk through the settings and the present examples.
Basic settings
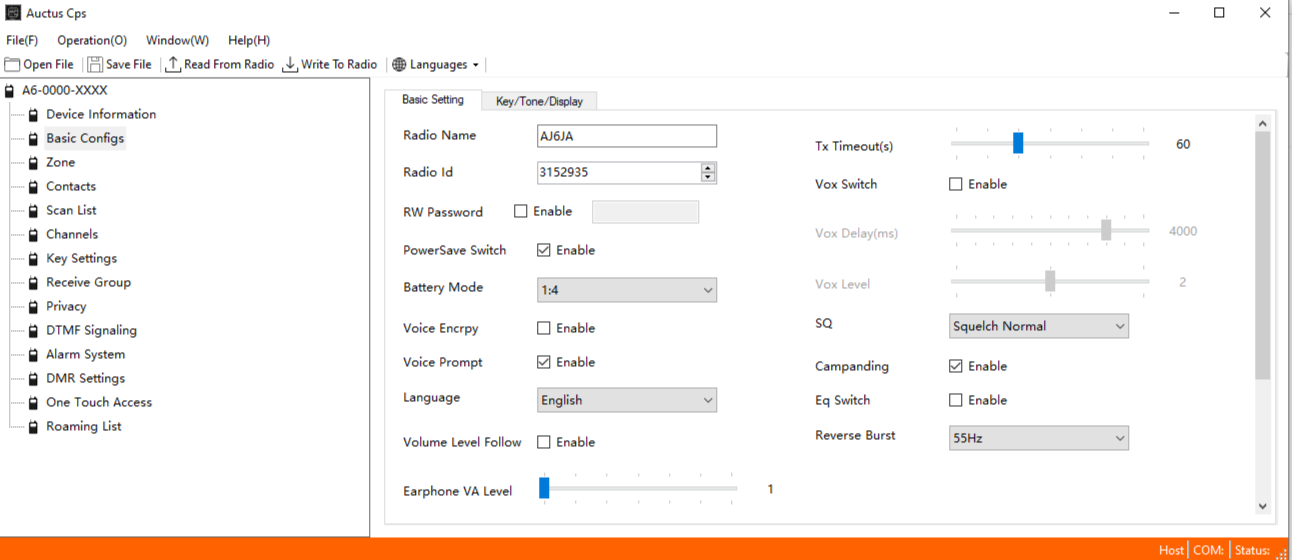
First the easy settings. Set your radio name and radio ID. You really need to get a RadioID and not just enter some random number. It takes a little bit of time and a copy of your license to get a RadioID assigned to you.
Relationship of the settings
I know this looks daunting, but lets go through the settings from the bottom up.
Contacts
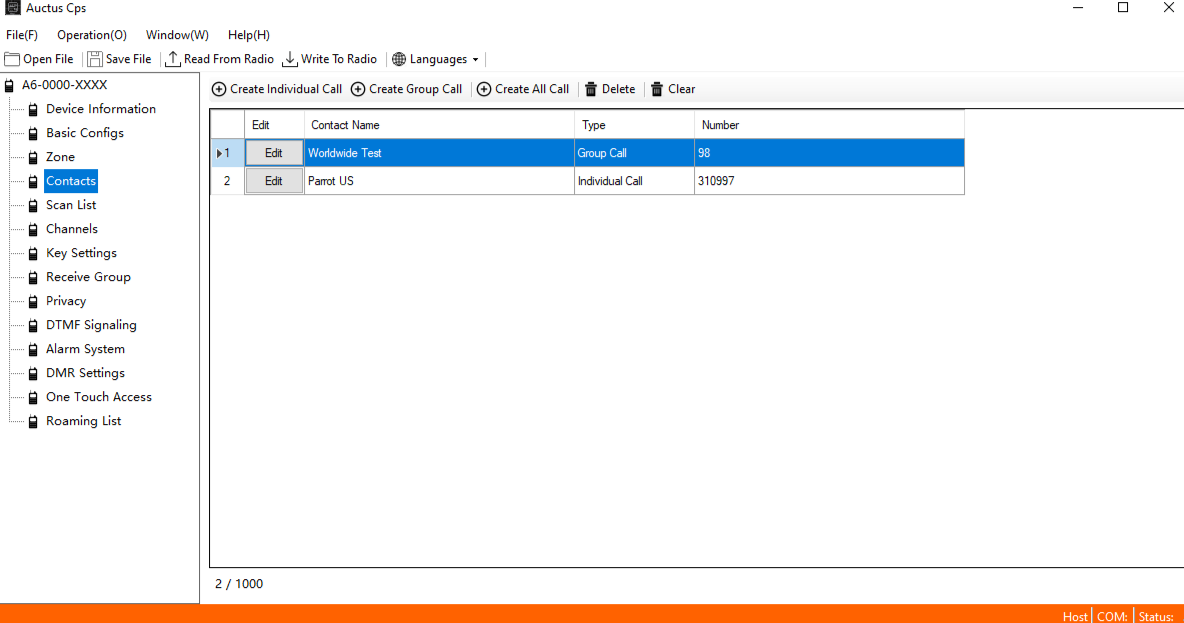
Contacts holds the talk groups and individuals you would like to talk with on DMR. Just type in as many and you think you might want. The names are just for your own information as there is no display to show them. Talk groups should be set as “Group Call” and people should be “Individual Call.”
ReceiveGroup
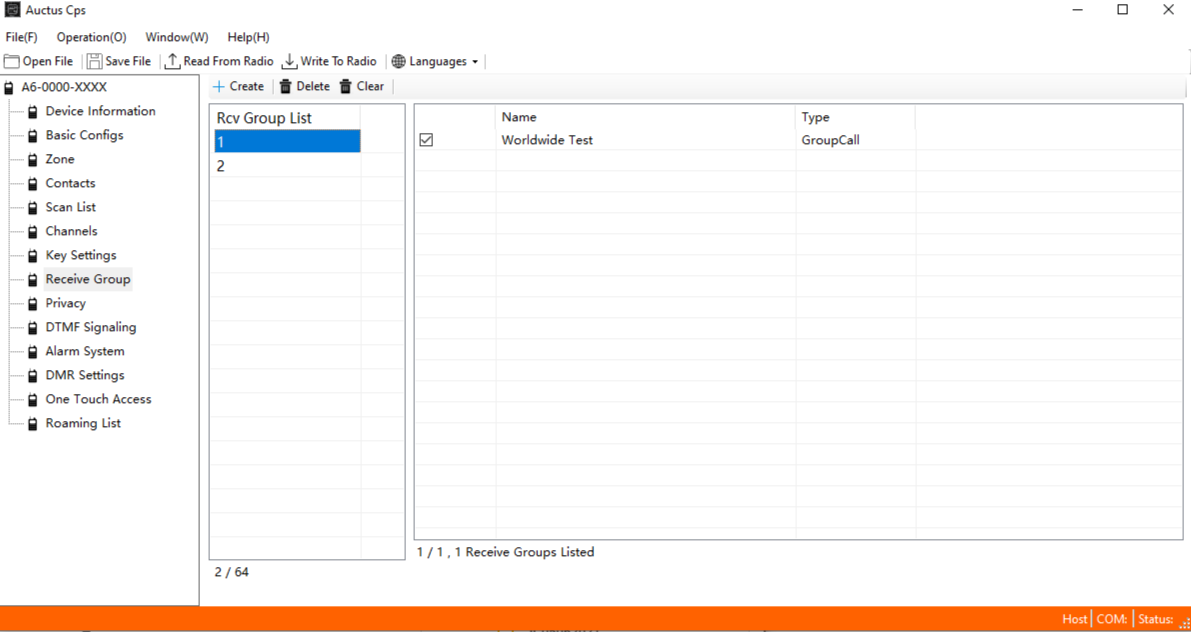
ReceiveGroup determines which contacts you will receive in a channel. For example, if your local repeater has Talk Groups 3106 and 3100 on time slot 1, if you select both in a ReceiveGroup you will hear transmissions to either group.
Only talk groups will appear in this area.
Channels
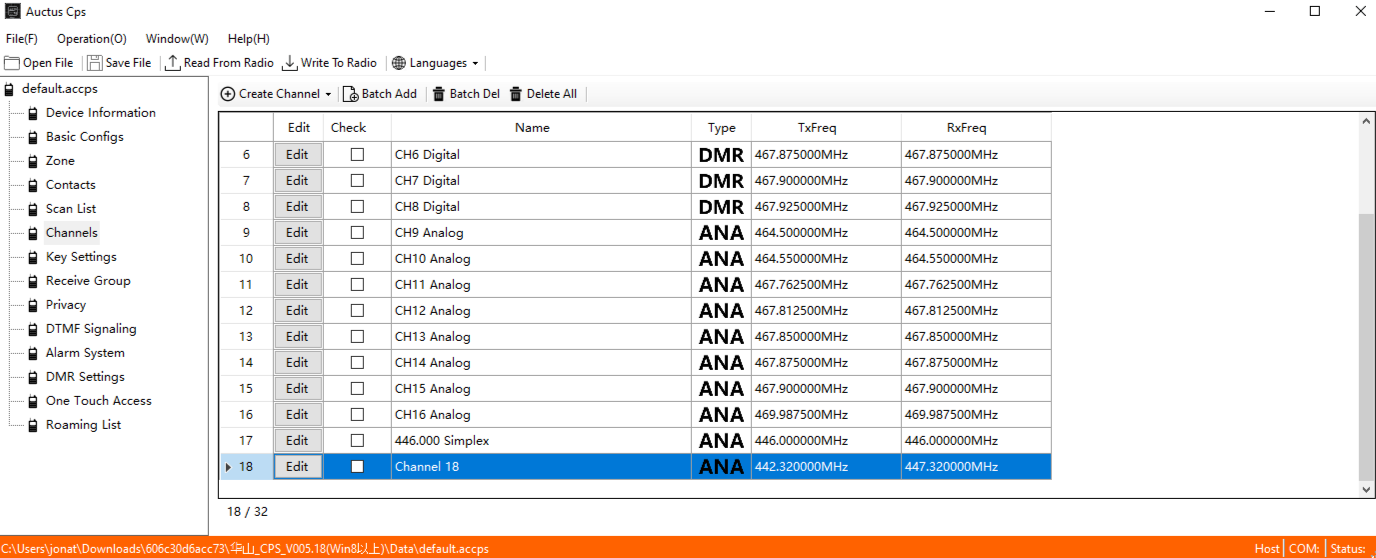
Channels come in two flavors Analog and Digital. Both hold the transmit and receive frequency information. Analog channels can also have CTCSS. Digital channels have Color Codes, Time Slots, ReceiveGroup and Contact. The contact is the person or talk group you will transmit to.
Zone
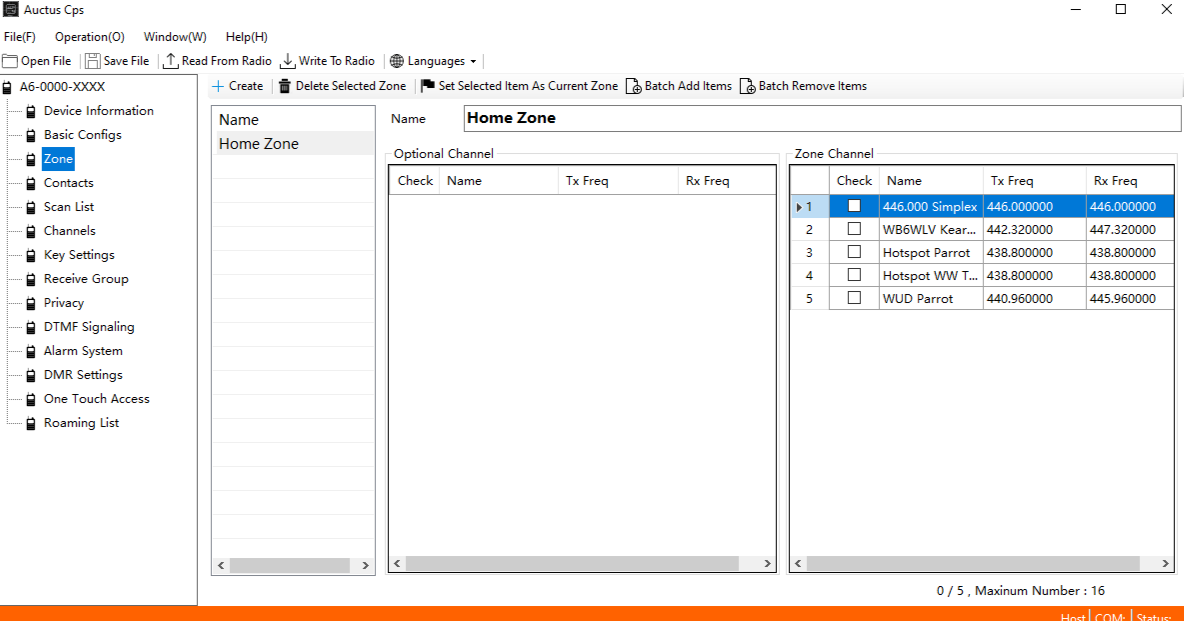
Finally, Zone sets what the channels on your radio are. There are 16 channels available.
Analog FM Simplex
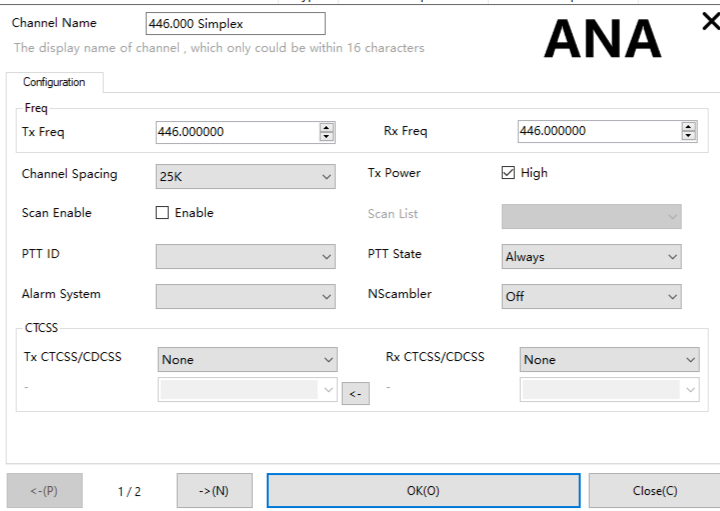
Make an analog channel and set the RxFreq, TxFreq equal to the frequency you would like to use. Add this channel to your Zone(you might need to click Batch Add to get this to update). Finally, write the code plug to your radio.
Analog FM Repeater
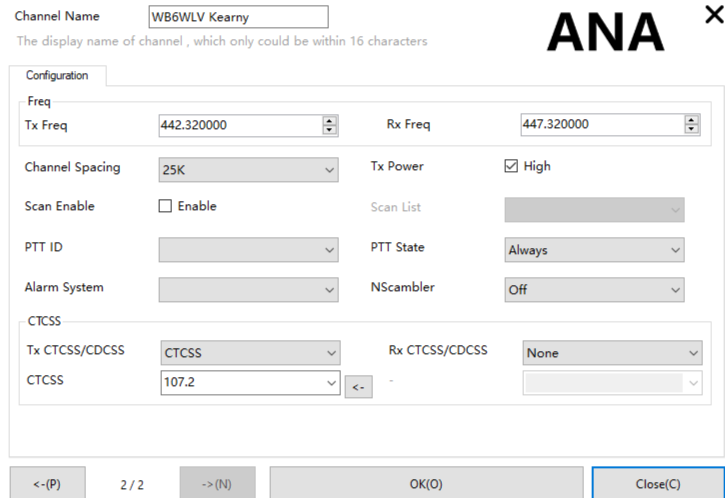
Make an analog channel and set the RxFreq, TxFreq equal to the frequency you would like to use. Add in the CTCSS code you need, usually you only need this on the TX side, but it depends on the repeater. Add this channel to your Zone(you might need to click Batch Add to get this to update). Finally, write the code plug to your radio.
DMR Simplex
To use DMR, you need to set up contacts and ReceiveGroups first. Make a digital channel and set the RxFreq, TxFreq to the desired frequency. Add in the contact and ReceiveGroup. Add this to your Zone and write the code plug to your radio.
DMR Repeater
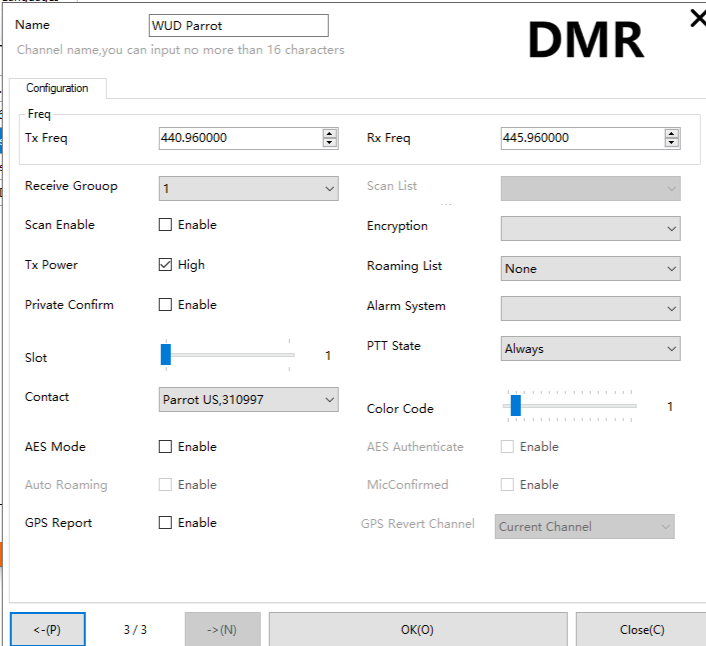
Again, you need to start with contacts and ReceiveGroup before setting up a repeater. Make a digital channel and set the RxFreq, and TxFreq to the desired frequencies. Add in the Time Slot and Color Code for the repeater. Set the contact and ReceiveGroup. Put this channel in your Zone and write the code plug.
DMR Hotspot
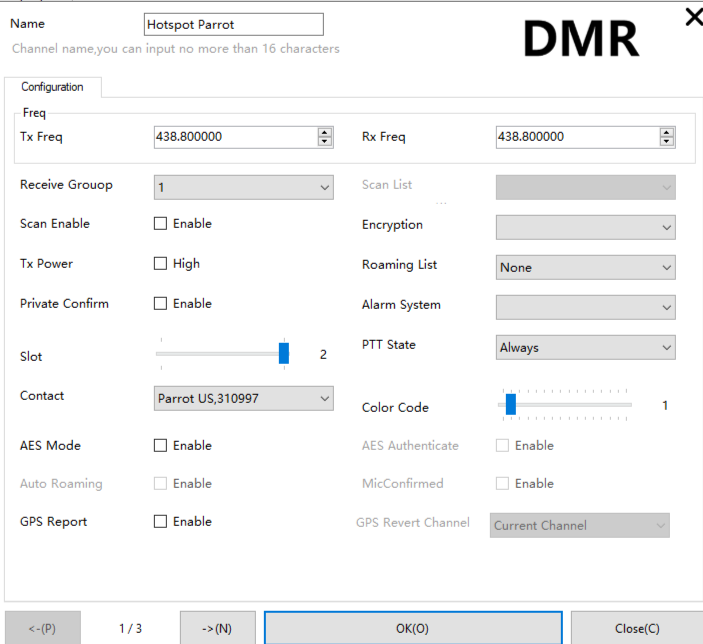
Again, you need to start with contacts and ReceiveGroup before setting up a repeater. Make a digital channel and set the RxFreq, TxFreq to the desired frequency. Add in the Time Slot(usually TS2) and Color Code(usually CC1) for the hotspot. You will probably want to turn off the high power mode as well. Set the contact and ReceiveGroup. Put this channel in your Zone and write the code plug.
Example Codeplug
Here is an example codeplug for the COTRE CO01D that I made using the GD100 CPS software. It should give you a starting place for making your own codeplug.
Conclusion
It works. It can be programmed. The software was hard to find and is poorly translated, but it isn’t impossible to figure out. Having a pretty simple radio makes it easier to set up than my Anytone. With only 16 channels and no display, there is no reason to mess around with downloading contact lists and adding in 1000s of talk groups. Try it out on 310997 Parrot or on Talk Group 98 Worldwide Testing to get the feel for it.